Custom File Import Procedure
1. Source file selection
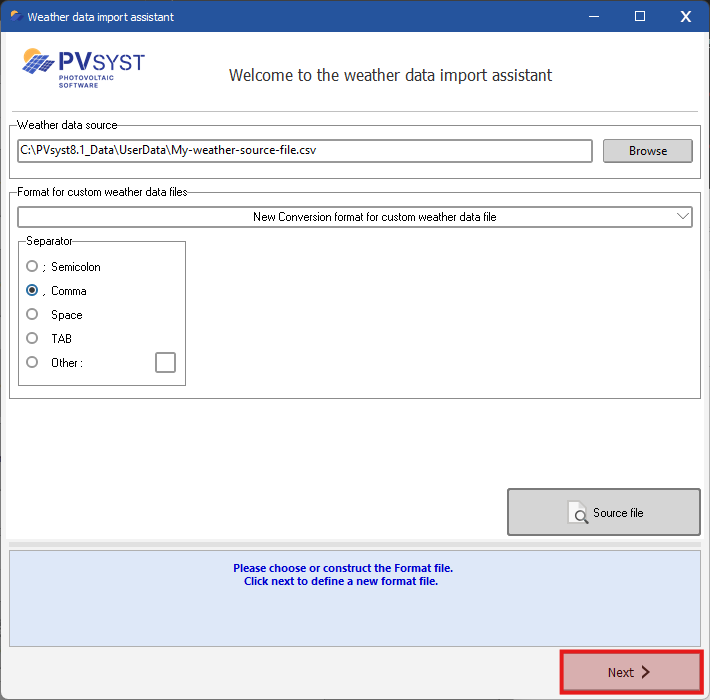
The first step consists of selecting the source file to import
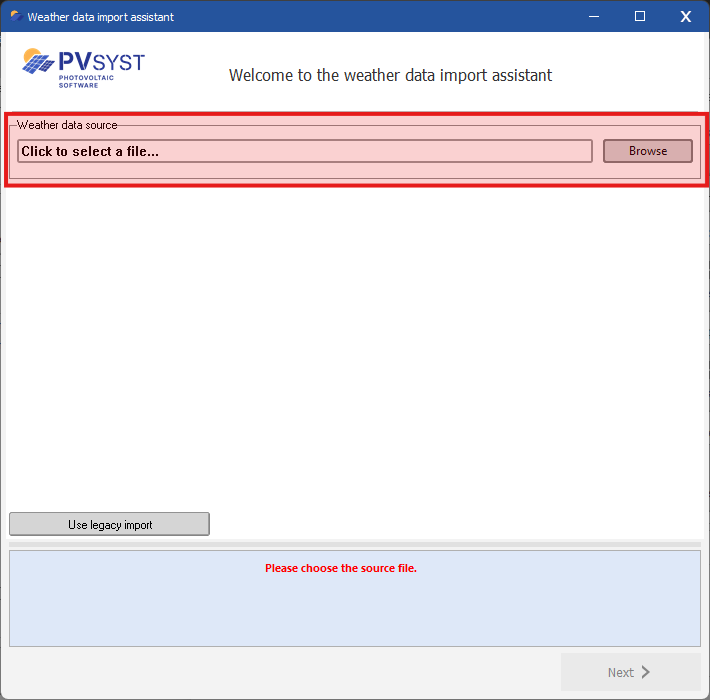
If available, an existing conversion format file can be applied; otherwise, keeping the combo box set to “New” will create one, requiring the user to define the file structure during the process.
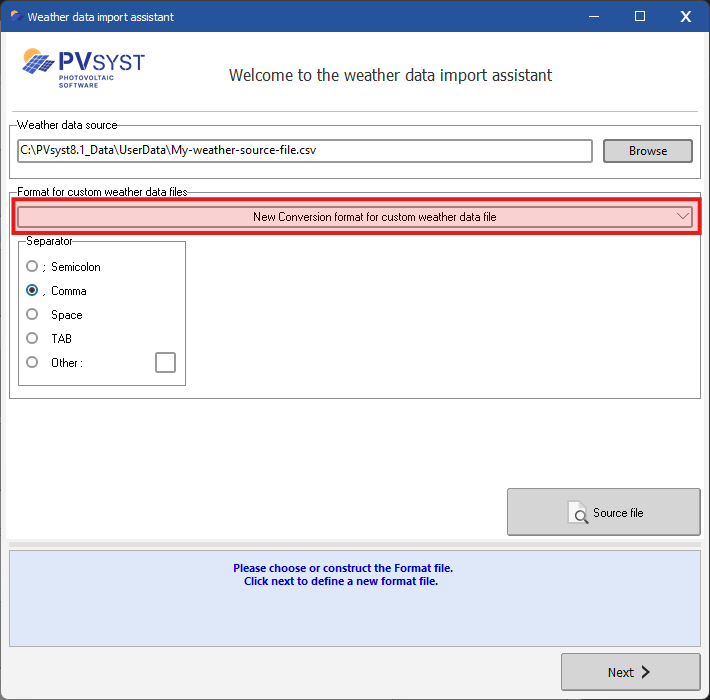
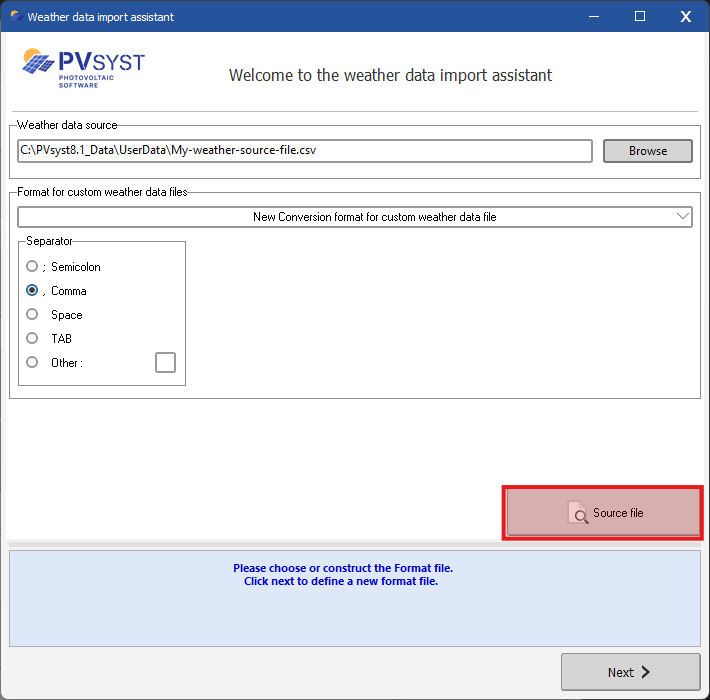
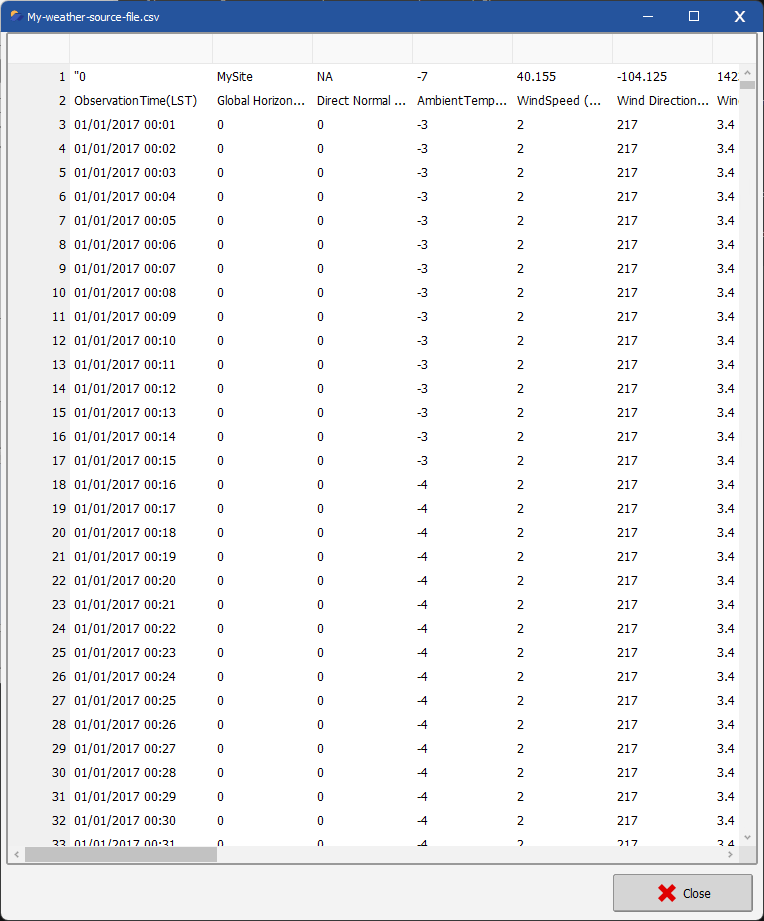
Note that PVsyst detects the separator used for the CSV and select it accordingly in the UI. The source file can also be previewed using the “Source file” button to verify its contents and ensure that each weather variable is correctly organized into separate columns.
Once a valid source file has been selected, the next step is available
2. Geographical site selection
In the second step, the geographical site associated with the source file is selected, either from existing sites in the database, by defining a new site using an interactive map or by entering its name and coordinates in the appropriate fields.
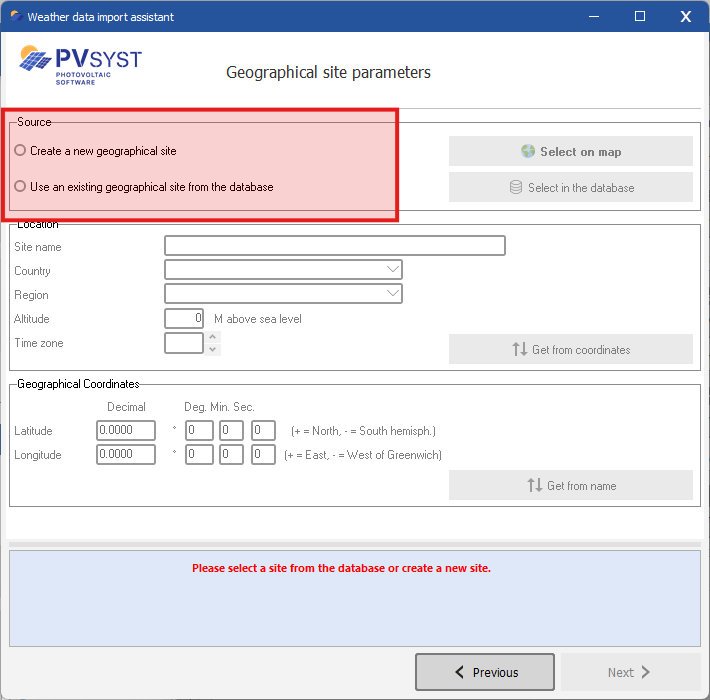
- Get from coordinates : Get the site name country, region, altitude and time zone from the longitude and latitude set in the geographical coordinates section
- Get from name : Get the latitude and longitude from the site name in the Location section
Once a valid site has been selected, the next step becomes available; when clicking “Next,” the assistant may prompt the user to save the site in the database if it is not already included.
3. Format file (MEF)
In Step 3, the conversion configuration can be loaded from an existing file, created from scratch, or edited.
a. MEF selection
The component at the very top enables to select the MEF being edited and applied to the imported weather data source file
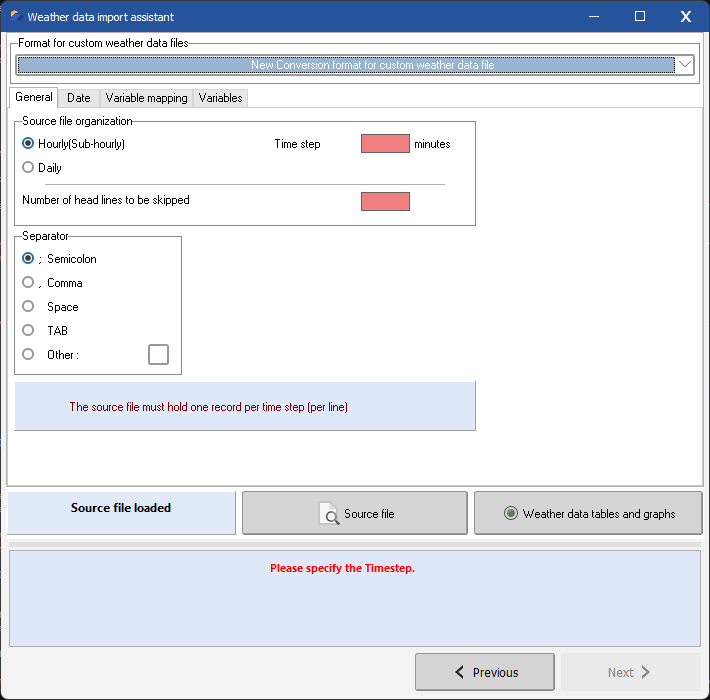
b. General tab
Defines general parameters of the source file, such as:
- Time step: the time interval between two consecutive records
- Number of header lines to skip: the number of lines to ignore at the beginning of the file
- CSV separator: the character used to separate values in the file
c. Date tab
Date types:
- Reference year : first recording corresponds to 01/01/1990 00:00
- Sequential dates : first recording correspond to date set in the begining date field
- Dates read on file : date format and column ids to be definedby the user
Note for Reference year and Sequential dates, the data is assumed to contain no gaps whereas for dates read on file, gaps can be filled to a certain extent (Ref to data gaps)
Date Format: For dates read from the file, specifies how the date information should be interpreted. The user selects a format from a predefined list, where the character “|” represents a column separator and “/” represents a separator between date components within a single column.
Examples:
- “Year | Month | Day | Hour”: each date component is provided in a separate column (each column id defined in the variable mapping).
- “YY/MM/DD hh/mm”: the full date is contained in a single column, with two digits for the year, followed by non-numeric separator(s), then two digits for the month, and so on.
Time Base: Indicates whether the dates read are expressed in legal time or in UTC
Time Shift: Shift to apply to the data read. Necessary when the data does not match the clear sky model.
Record Time label: Indicates when to apply the values in the timestep period.
Daylight saving time:
In PVsyst, internal weather data—expressed in Legal Time—does not account for the “Summer Time” (Daylight Saving Time) shift: timestamps remain referenced to the original time zone (typically winter time) throughout the year.
When importing weather data, the source file may include such time shifts, which must therefore be corrected. As the transition dates are not fixed and follow region-specific rules, they may vary depending on location.
PVsyst provides default settings based on the geographical site:
Europe: transition to summer time on the last Sunday of March, and back to winter time on the last Sunday of October at 01:00 United States: transition to summer time on the second Sunday of March, and back to winter time on the first Sunday of November at 02:00 Custom: user defined summer and winter start
The user is prompted to review and, if necessary, adjust these dates as they depend on the specific year.
Note: After conversion, it is strongly recommended to verify the results using daily plots, particularly the alignment of hourly data with the Clear Sky model.
Beginning date: User defined first record date in the case of Date Type set to sequential.
d. Variable mapping tab
This section allows the mapping of date and weather data columns. To configure it, it is recommended to open the source file, identify the relevant columns, and assign the corresponding field numbers and units in the user interface.
for instance with a given source file :
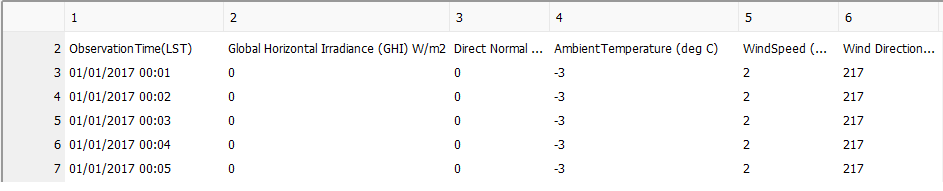
Date and Time are located in column 1, GHI in column 2, and Temperature in column 4; the corresponding configuration should be set accordingly.

The list of PVsyst variables can be found here
e. Variables tab
Power or Energy: If your source file is recorded with a time step less than one hour, you have to specify if the data are in Power (ex. [W/m2 ]) or in Energy (ex. [ kJ/m2 ], [Wh/m2]).
With power measurements the interpreter performs an average over the hour.
With energy measurements it will perform a sum.
Solarimeter: Set the solarimeter orientation when the source data defines irradiance in the Plane Of the Array (POA).
f. Conversion status and MET validation
Unless an error occurs and is reported in the info panel at the bottom of the interface, the assistant performs the conversion using the current configuration. Any modification to the configuration automatically triggers a new conversion.
The conversion status is displayed in the Status area:

Status stages :
- Loading source file
- Processing weather data
- Post-processing data
- Data generated
Once the data has been generated, it should be reviewed using the tools available in the weather data tables and graphs dialog:
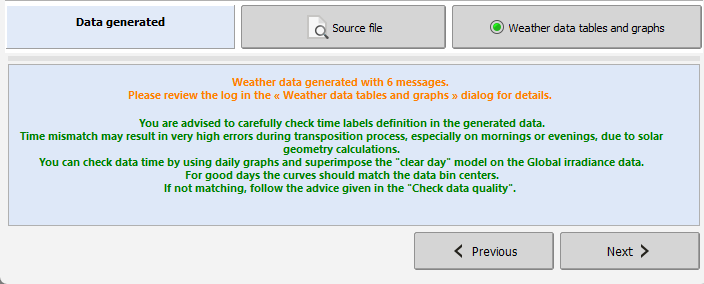
The colour of the button indicates the result of the MET quality check:
- green : MET generated OK
- orange : MET generated has warning to be reviewed
- red : MET generated has error and is not fit for simulation
Once the generated weather data meets the required quality standards, click Next to proceed to the following step.
If the MEF has been modified, the assistant may prompt to save it when clicking Next
4. Save MET file
Final step: save the MET file and add it to the Weather file database.
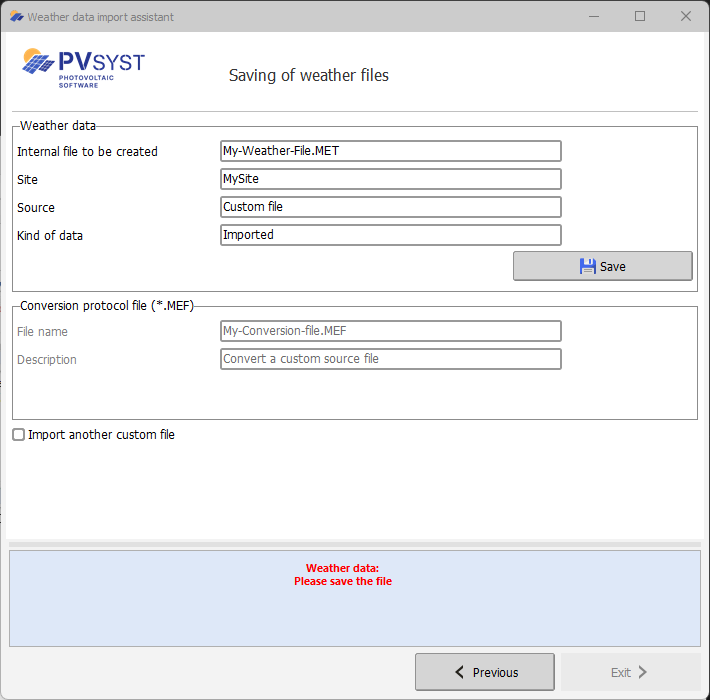
Import another custom file enables to start the process again, importing another source file, keeping the site and MEF file selection